Hello hello there. I have a newsflash, a just-in report to detail that crazy picture with a pipe and a press that you may have just seen on Facebook. This past week has been a marathon session of sweat and tears (so far no blood) in a very hot studio, but the results are finally paying off. I've been working for Jay to get some initial prints ready for exhibition in a museum show at Smith. And the deadline is soon! For the past month I have spent some good ponderous time, staring at the ceiling, trying to figure out the best way to register a woodblock and an etching together on dampened paper, with barely any room to spare on a medium-sized press. Thus far it was all theory and so I had to put it to the test!
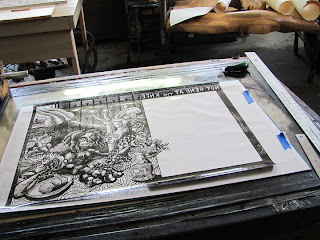
Here begins my crazy registration. I have the dampened paper size traced on a sheet of newsprint, then place a mylar taken from the woodblock on top, to line up where the copper plate goes (lined up inside that blank rectangle area, having to match the images that overlap). Then, I trace the copper plate's position on the newsprint.
Lining up mylar for registration of woodblock with copper plate
Next I place the woodblock where it fits underneath the mylar and trace its border exactly. This newsprint gets placed under a clean piece of mylar and onto the press bed. I don't tape it down, as there is such little room to work with on the press that I have to place the paper first, then scoot everything right up to/underneath the roller. Otherwise, it won't come far enough through to the other side.
Tracing the border of the woodblock on the registration
Next I am ready to print! But this is no ordinary copper plate. Jay has written all of the lettering in reverse with hardground (I know, it's astounding!). So, the plate is actually etched in relief, with the text raised. However, we do not print it in relief but rather in 'intaglio-manner.' Being trained in traditional intaglio printing I proudly went at it with tarlatan and silk, only to be deflated by a very crappy and washed-out looking print. So I asked Jay to please demonstrate what the heck he did to get such nice results. He wiped the whole thing with a piece of paper!
Wiping relief intaglio plate with stiff, medium-thick paper, folded in eighths. The paper must be constantly re-folded to get to a clean surface
This way, only the surface and a good distance away from the letters is actually wiped clean, leaving a nice, dark halo around each letter (although you really have to push around and manhandle the plate- not for the fainthearted!- I am using a mix that includes stiff Portland Black). Next is the final 'buffing' and polishing wipe with phone book pages.
Phone book wipe
It really helps to get a nice clean wipe after I scraped, burnished, and polished all of the edges of the plate, as well as going over the surface of all the letters with a charcoal block and a little oil.
Here is a close-up of the wiped plate:
Intaglio-wiped letters in relief
Next, I place the plate on the press, lining it up with the traced registration marks.
Copper plate on press
Then, I get the woodblock all inked-up and ready to go.
Inked woodblock
To start printing, I line up the blotted paper with my registration lines and print the copper plate. I have the paper with a long tail on the side of the press furthest from the roller. This method is commonly used for printing multiple intaglio plates.
Now that the tail of the paper and the registration mylar are all still caught under the roller, I flip the blankets and print up over the roller and switch out the copper plate with the inked woodblock, lining it up with it's own registration marks. I also repeatedly mist the paper with water so that it doesn't dry out and change sizes too quickly.
Woodblock lined up with registration while caught print and felts lie over the roller
Next I hold the paper taught as I flip it back over the roller and place it onto the woodblock, smoothing it down with my hands so it stays in place. Then, I have to change the pressure, as the woodblock is much, much thicker than the copper plate. This is a huge challenge as the felts and paper are still caught under the roller! So I have to enlist the power of leverage via a huge metal pipe, which is of course, excessive and heavy, simply completing the printmaking circuit-training workout.
Loosening the pressure with a pipe
Then, the two-handed simultaneous pressure release- tricky! I have to get it correct for the printing pressure of the woodblock (and yes I am wearing a wrist-wrap so carpal tunnel doesn't come back for revenge).
Two-handed pressure change
Then, I insert a piece of newsprint and blotters on top of the paper and woodblock for firmer pressure. With all of this fussing around, the paper should not move as it is stuck to the tacky relief ink on the block.
Placing blotters over block
And lastly the full-body arm-and-hip shove while simultaneously cranking to get the whole print sandwich moving under the roller. Is it just us women that work this way?
Full-body bed engagement
And as I sweat more bullets, I lift the print, crossing my fingers that the registration has worked. Tada!
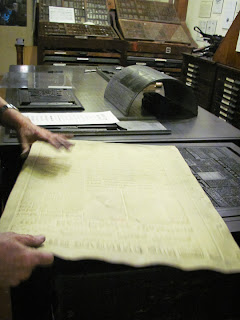
Pulling the print
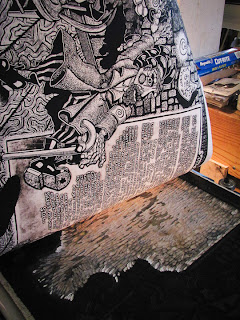
Here is a close-up of the print. The woodcut is the image of the figure, and the intaglio is the text. Hooray, I think Jay's work looks great!
Close-up of print
So after much trial and error, we finally have results. One major change was from Hahnemuhle Copperplate paper to Arches Cover- the Copperplate was not quite the right size in sheet form, plus we needed rolls for an even larger print which I may or may not explain later (a double-spread of these blocks and plates, 62" long, printed several times, folded different ways, each time 'eyeballing' using the mylar). And besides, somehow the woodblock looked even more rich and delicate and the plate had more punch on the Arches.
This intaglio registration method of catching under the roller was the only practical thing I could come up with as I had to use dampened paper. Registration pin holes would have stretched, and eyeballing wasn't quite cutting it (although as said, I am forced to do so with the larger prints as there is no room for a 'tail').
If anyone has suggestions or thinks I'm off the deep end here, feel free to say so, but hey- so far so good! Happy editioning to all, and better keep those print muscles in shape!!


